
The truth is, enjoying a smoothie is one thing, but cleaning the blender afterward feels like nothing less than a headache. Seeing those sharp blades is scary, and reaching all the way to the bottom seems almost impossible. Often, we just swirl some water around and leave it at that, thinking, “Oh well, this should be enough.”
But honestly, you’re not alone—everyone does this! The good news is that cleaning a blender isn’t as difficult as we’ve made it out to be. You just need the right technique. In this guide, I’ll tell you how to do your daily cleaning in just 1 minute, and if old dirt or a strange smell has built up in the blender, how to remove it completely from the root.
Why Cleaning Your Blender Actually Matters
A dirty blender isn’t just gross — it’s a health risk. Food residue left behind can grow bacteria, mold, and yeast, especially in warm kitchens. It also shortens the life of your appliance. A little care goes a long way.
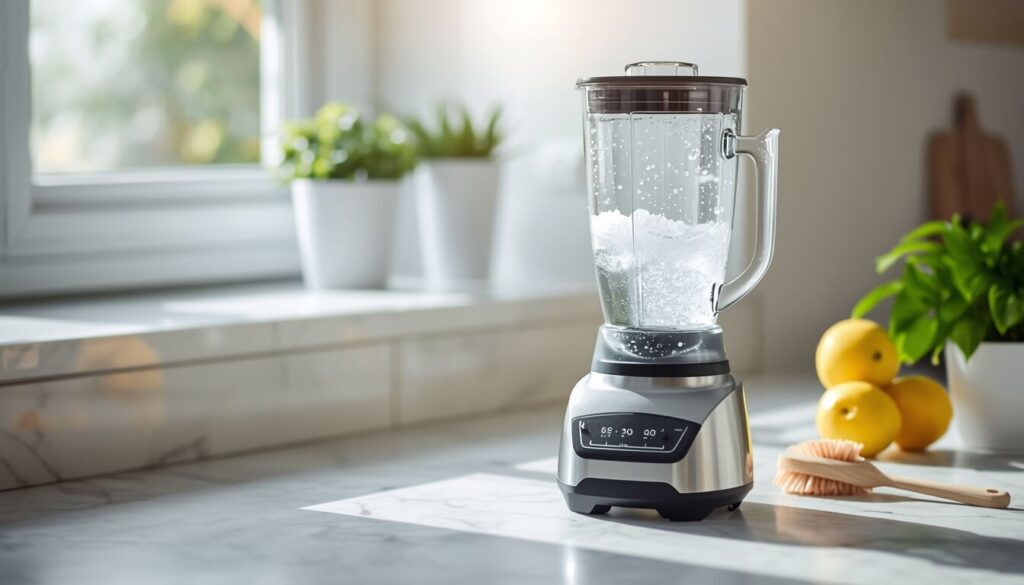
The Self-Cleaning Method (Your New Best Friend)
This works for 90% of everyday blending situations.
- Rinse the blender jar immediately after use — don’t let food dry.
- Add warm water until the jar is halfway full.
- Add one or two drops of dish soap.
- Put the lid on firmly and blend for 30–60 seconds.
- Rinse thoroughly and air dry upside down.
That’s it. The blender cleans itself. The spinning action creates enough force to scrub the inside walls and around the blades without you touching a thing. It takes under two minutes.
Can You Wash the Bottom Part of a Blender?
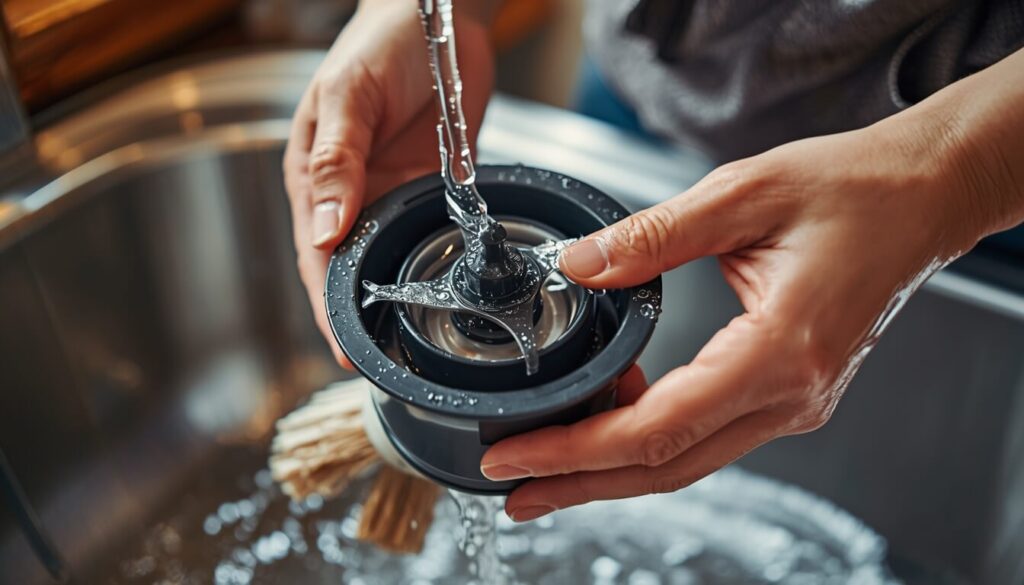
Yes — and you absolutely should. The base (motor unit) and the blade assembly at the bottom of the jar are two different things, and people often confuse them.
The blade assembly — the part that screws onto the bottom of the jar — can and should be cleaned. Residue builds up around the rubber gasket and under the blade, which you can’t always see. Here’s how to handle it properly:
- Unscrew the blade assembly from the jar after blending.
- Rinse it under warm running water.
- Use a small brush (a bottle brush or an old toothbrush works great) to clean around the blade and gasket.
- Let it dry fully before reassembling.
The motor base — the electric unit that sits on your counter — should never be submerged in water. Wipe it down with a damp cloth and dry it immediately. That’s all it needs.
Is Rinsing the Blender Enough?
Short answer: sometimes yes, usually no.
If you just blended water or a light, watery drink, a quick rinse is fine. But for anything thicker — smoothies, sauces, soups, nut butters — rinsing alone leaves behind residue. That residue builds up over time, causing stains, odors, and bacteria growth.
The rule of thumb: if what you blended had color, fat, protein, or dairy in it, do the full self-clean method with soap and warm water. It takes 60 seconds and makes a real difference.
Can You Wash a Blender With Just Water?
You can, but it’s not always effective. Plain water removes loose food particles, but it doesn’t cut through grease, oils, or sticky residues. Soap is necessary for a proper clean.
That said, hot water does more than cold water. If you’re in a pinch, add very hot (not boiling) water and blend for a full minute. The heat helps loosen stubborn residue. Follow up with a soapy rinse when you get the chance.
For a completely fresh-smelling blender, add a few drops of white vinegar or a squeeze of lemon juice to your cleaning blend. Both are natural deodorizers and help break down buildup without any harsh chemicals.
Deep Cleaning Your Blender (Do This Once a Week)
The self-clean method is great for daily use. But once a week — especially if you blend regularly — give your blender a proper deep clean.
- Disassemble the jar, lid, and blade assembly completely.
- Soak all removable parts in warm, soapy water for 10–15 minutes.
- Scrub the inside of the jar with a soft sponge or bottle brush.
- Use a small brush to clean around and under the blades carefully (they’re sharp — be cautious).
- Clean the rubber gasket separately — it traps smells and bacteria easily.
- Rinse everything thoroughly and dry completely before reassembling.
Never put wet parts back together. Trapped moisture leads to mold.
Dealing With Stains and Odors
For stains (from berries, turmeric, tomato sauce): Make a paste of baking soda and water. Apply it to the stained area, let it sit for 5–10 minutes, then scrub and rinse.
For odors: Blend equal parts water and white vinegar for 30 seconds. Let it sit for a few minutes, then rinse well. The vinegar neutralizes smells without leaving its own scent behind once dry.
For dried, stuck-on residue: Fill the jar with warm soapy water and let it soak for 20 minutes before running the self-clean cycle. Soaking does most of the work for you.
What About Cleaning a BeautyBlender?
A BeautyBlender is a makeup sponge — completely different from a kitchen blender — but since people often ask, here’s the answer.
The best way to clean a BeautyBlender is to wet it fully, apply a gentle cleanser (a dedicated BeautyBlender cleanser, baby shampoo, or mild soap all work well), and squeeze it repeatedly until the water runs clear. Don’t twist or wring it — that can tear the foam. Rinse thoroughly, squeeze out excess water, and let it air dry completely in an open space. Never store it in a sealed container while damp.
A Few Things to Avoid
- Submerging the motor base in water. It will ruin the motor.
- Putting blender jars in the dishwasher repeatedly. Some are dishwasher-safe, but heat and harsh detergents dull the plastic and can warp seals over time. Hand washing extends the life of your blender.
- Leaving food in the blender for hours. The longer it sits, the harder it is to clean — and the more bacteria you’re dealing with.
- Cleaning blades with bare hands. Always use a brush or cloth to clean around blades. They stay sharp longer than you expect.
Quick Reference: Which Method to Use
| Situation | What to Do |
|---|---|
| Just blended a smoothie | Self-clean method (30 sec) |
| Strong smells or stains | Vinegar or baking soda soak |
| Weekly maintenance | Full disassembly and hand wash |
| Sticky, dried residue | Soak first, then self-clean |
Final Thoughts
Cleaning a blender doesn’t have to be a battle. A quick 60-second self-clean after every use keeps things fresh without any effort. Add a weekly deep clean, and your blender will stay hygienic, odor-free, and working well for years.
The trick is not to let things sit. The sooner you rinse or clean after blending, the easier everything is. Build it into your routine and you’ll barely notice you’re doing it.
Now go blend something delicious — and clean up in under two minutes.
FAQs
You should rinse your blender immediately after every use using the self-clean method. Do a full deep clean — disassembling the jar, blades, and gasket — at least once a week, especially if you blend daily.
Some blade assemblies are labeled dishwasher-safe, but hand washing is always the safer choice. Repeated dishwasher cycles can dull the blades, warp rubber gaskets, and break down seals faster than hand washing does.
Odors usually come from residue trapped under the blade or inside the rubber gasket. Disassemble the blade assembly fully, scrub with a small brush, and run a 50/50 water and white vinegar blend for 30 seconds. Let it air dry completely — never reassemble while damp.